
Water has an insidious way of undermining the structural integrity of a house long before any visible signs appear on finished surfaces. A slow seep behind a laundry wall, a microscopic breach in an exterior sill, or persistent humidity beneath a concrete slab can silently rot structural framing, degrade subfloors, and compromise indoor environmental quality. Unchecked moisture leads to compounding repair bills and creates complex disputes with home insurance carriers, whose policies frequently exclude gradual deterioration and biological growth.
Protecting a residential structure requires an understanding of how moisture moves through building assemblies via liquid flow, capillary action, air leakage, and vapor diffusion. Addressing these risks calls for a dual approach: executing rapid remediation protocols when bulk moisture intrudes, and building durable physical defenses across the entire building envelope. By methodically fortifying below-grade foundations, exterior cladding, overhead roofing systems, and domestic plumbing lines, homeowners can protect their equity, preserve structural longevity, and maintain a healthy living space.
Shut Off Core Utilities and Extract Standing Moisture Within 24 Hours
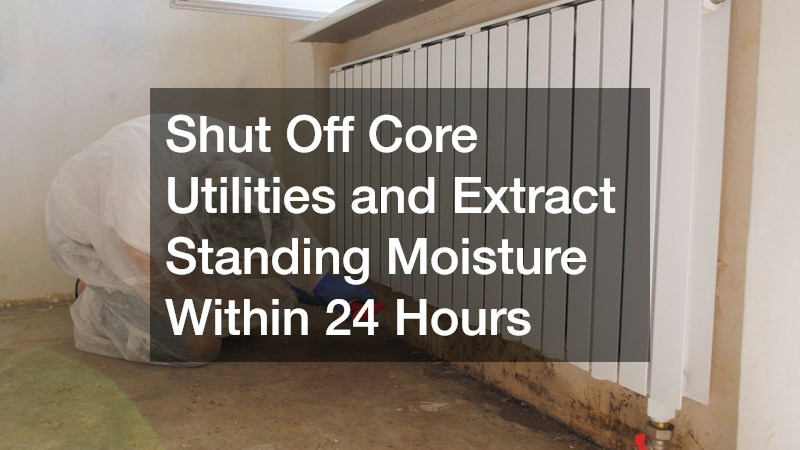
Before stepping into standing water, cut the primary power supply at the breaker panel to prevent electrical shock. If the main service disconnect sits submerged, contact your utility provider directly to shut off power at the exterior meter. Once electrical safety is verified, establish mechanical extraction as rapidly as possible:
- Categorize the water supply immediately to dictate handling protocols: Category 1 originates from broken supply pipes and presents clean water; Category 2 includes discharge from dishwashers or washing machines carrying mild contaminants; Category 3 comprises raw sewage or storm groundwater that contains heavy pathogens.
- Deploy submersible pumps or wet-dry extraction vacuums to remove bulk standing liquid, focusing attention on low floor joints, floor drains, and perimeter tracks where pooling hides.
- Position commercial low-grain refrigerant dehumidifiers alongside centrifugal air movers to generate balanced airflow across damp assemblies.
- Track ambient relative humidity and timber moisture content using pinless and penetrating meters, maintaining drying efforts until readings drop below 15 percent.
Property owners facing widespread flooding across multiple levels frequently benefit from hiring an IICRC-certified water damage restoration company. Certified teams deploy thermal infrared cameras to trace moisture migrating behind undisturbed wall cavities, set up HEPA-filtered air scrubbers, and document drying progress for insurance claims.
Treat Porous Surfaces and Decontaminate Air Cavities Before Enclosing Walls
Extracting visible surface water resolves only a fraction of the total moisture load. Capillary suction draws moisture upward into porous wallboards and structural studs, creating humid interstitial environments ripe for biological activity:
- Cut away water-damaged drywall at least 12 to 18 inches above the highest documented moisture line using an oscillating tool, ensuring straight seams that facilitate future taping.
- Strip wet fiberglass batt or blown cellulose insulation down to bare wall studs, as saturated insulation loses thermal resistance and traps liquid directly against framing.
- Remove saturated carpet pad entirely, as polyurethane foam breaks down rapidly when wet and cannot be reliably dried or sanitized in place.
- Scrub exposed structural lumber using an EPA-registered quaternary ammonium or botanical antimicrobial solution rather than household bleach, which fails to penetrate porous wood grain.
- Sand and clean contaminated surfaces to achieve comprehensive mildew removal across bottom wall plates, rim joists, and floor sheathing before running HEPA vacuum passes.
Never close up framing with new drywall until lumber moisture readings demonstrate stable baseline levels across all internal wall studs and sill plates.
Relieve Hydrostatic Pressure by Managing Subsurface Water Tables
Managing subsurface groundwater requires establishing an unobstructed path of least resistance away from footings. Passive earth drainage combined with active pumping assemblies creates a reliable defense against rising water tables:
- Install a continuous interior drain tile loop along the inner footing perimeter, utilizing perforated four-inch rigid PVC pipe bedded in washed crushed stone.
- Fasten dimpled plastic drainage core boards along the foundation wall base to channel incidental concrete seepage directly into the interior stone trench without staining floors.
- Equip the sump basin with a cast-iron primary pump rated at one-half horsepower, paired with a dual-float mechanical switch that minimizes mechanical failure.
- Mount a secondary, independent DC battery-backup sump pump above the primary switch height to maintain pumping continuity during power outages.
Homeowners planning structural renovations often invest in comprehensive basement waterproofing to transform damp subterranean storage areas into livable, climate-controlled space. These integrated packages seal off floor-to-wall joints, stop floor moisture emissions through low-permeability vapor retarders, and maintain relative humidity below 50 percent.
Inject Foundation Fractures and Grade Soil Away from the Perimeter

Poured concrete foundation walls naturally form shrinkage fractures during curing, while older block foundations develop stepped settlement fissures over decades of seasonal thermal cycles:
- Treat static and non-structural hairline cracks from inside the basement using low-pressure polyurethane foam injection, which expands deep within the fracture to create a flexible, watertight gasket.
- Apply structural epoxy injections to stabilizing fractures where movement has ceased, pinning the split concrete sections together to restore aggregate interlock.
- Re-establish positive perimeter surface grading by maintaining a minimum fall of six inches over the first ten feet radiating outward from exterior foundation perimeter walls.
- Extend roof downspout discharge elbows at least six to ten feet away from exterior masonry, releasing roof runoff onto splash blocks or into buried solid PVC drain lines.
When deep exterior excavation, continuous positive-side damp-proofing, or structural piering becomes necessary, vet licensed waterp roofing contractors who possess extensive geotechnical expertise. Reputable specialists carry dedicated trade insurance, supply verifiable customer references, and back below-grade drainage installations with fully transferable structural warranties.
Reinforce Vulnerable Roof Penetrations, Valleys, and Step Flashing
Roof penetrations require continuous mechanical water deflection rather than perpetual reliance on exterior caulking compounds that shrink and crack under solar ultraviolet radiation:
- Inspect neoprene and EPDM rubber vent pipe boots every spring; replace cracked collars with heavy-duty silicone retrofit flashings to prevent driving rain from trickling down plumbing vent stacks.
- Install two-piece counter-flashing systems along brick chimneys, embedding the upper reglet bend securely into mortar joints while allowing the base apron flashing to float freely over seasonal expansion cycles.
- Replace rusted or lifting step flashing along dormer sidewalls, weaving individual galvanized or aluminum step tins under each successive shingle course up the incline.
- Keep open or closed valleys clear of accumulated pine needles, deciduous leaf litter, and tree branches that block stormwater flow and create standing water channels along valleys.
- Balance ridge venting with continuous soffit intake grilles to maintain uniform attic temperatures, eliminating winter ice dams that force trapped snowmelt beneath outer shingles.
Scheduling seasonal roof repair at the earliest sign of warped decking, lifted tabs, or granule loss prevents slow water seeps from rotting ceiling framing, degrading blown insulation, and staining top-floor drywall.
Select Impact-Resistant Shingles and Underlayment for Long-Term Durability
When older architectural shingle layers reach the end of their operational lifespan, specifying high-performance components during replacement pays major dividends over subsequent decades:
- Mandate the installation of self-adhering modified bitumen ice-and-water membranes along roof eaves, dead valleys, skylight perimeters, and rakes, extending inward at least twenty-four inches beyond the interior exterior wall plane.
- Choose synthetic polypropylene underlayment across the remaining deck planes, taking advantage of its superior tear resistance and water-repellent properties compared to traditional saturated asphalt felt.
- Upgrade to Class 4 impact-resistant architectural or composite shingles that resist heavy hail strikes and carry high-wind ratings up to 130 miles per hour.
- Fasten starter strip courses along all exterior edges using corrosion-resistant roofing nails rather than staples to prevent progressive wind uplift along the eaves.
Engaging certified roofing contractors with factory-backed credentials guarantees that the replacement assembly satisfies strict local wind codes, attic ventilation standards, and comprehensive manufacturer warranties for materials and labor.
Maintain Cladding Drainage Planes and Clear Weep Holes

Moisture entering past the exterior veneer must drain downward and evaporate freely through a dedicated drainage space rather than accumulating against structural oriented strand board sheathing:
- Construct a vented rainscreen assembly by installing vertical furring strips behind cladding, establishing a continuous three-eighths-inch gap that accelerates convective air drying.
- Preserve clear weep holes along the bottom course of brick veneer and vinyl cladding accessories, clearing away mortar droppings and garden mulch that choke outflow channels.
- Maintain a minimum clearance of two inches between bottom cladding edges and horizontal roof flashing, deck boards, or hardscape patios to prevent capillary moisture absorption.
- Seal trim-to-siding joints using premium elastomeric polyurethane or hybrid polymer sealants, avoiding unpainted silicone formulations that pull away under sustained thermal cycling.
Homeowners investing in a full siding installation should specify high-performance vapor-permeable housewraps with taped joints, combined with metal Z-flashing over all horizontal window heads and beltline trim boards, ensuring that exterior moisture sheds away cleanly from structural framing.
Integrate Self-Adhered Sill Pans and Flexible Flashing Around Openings
Apertures represent substantial disruptions to the continuous weather-resistive barrier. Windows frequently leak around mounting flanges and interior rough openings if flashing layers are assembled out of order:
- Form a continuous, sloped sub-sill pan using formable, self-adhering butyl flashing membrane across the rough sill framing, creating an upward back dam to catch incidental water.
- Install window units plumb and level over the flashing pan without caulking the bottom exterior mounting flange, permitting accumulated condensation or rain to escape downward.
- Layer flexible flashing shingle-style: apply the bottom apron first, follow with the vertical side jamb tapes overlapping the sill, and finish with the head flashing overlapping the side tapes.
- Insulate the interior perimeter gap between window frames and rough rough-stud framing using low-expansion closed-cell polyurethane foam designed specifically for fenestration units.
Selecting experienced window installers who follow strict ASTM E2112 installation procedures ensures that window assemblies remain airtight and completely watertight against severe lateral storm pressures for decades.
Regulate Main Water Pressure and Upgrade Vulnerable Flexible Supply Hoses
Excessive municipal water pressure stresses internal pipe joints, weakens appliance valves, and shortens the operational lifespan of hot water heaters:
- Measure incoming static water pressure at an exterior threaded hose bib using an oil-filled pressure gauge; readings should ideally settle between 50 and 70 pounds per square inch.
- Install or replace an aging pressure-reducing valve on the primary main line if municipal pressures routinely spike above 80 pounds per square inch during off-peak hours.
- Replace brittle braided rubber supply hoses on washing machines, dishwashers, and toilet tanks with braided stainless-steel supply lines labeled for burst resistance every five to seven years.
- Mount an automated whole-home smart shut-off valve on the main water supply line, which continuously tracks micro-leaks, monitors baseline flow rates, and isolates municipal flow automatically upon detecting continuous abnormal draw.
- Wrap all exposed copper or cross-linked polyethylene pipes situated in unheated basements, attics, and exterior overhangs with closed-cell tubular foam insulation to prevent freezing bursts during cold snaps.
Promptly executing localized plumbing repair at the first observation of green copper oxidation, pinhole seepage, or dripping shut-off valves stops small moisture spots from deteriorating kitchen cabinetry and rotting adjacent structural joists.
Clear Underground Drain Mains and Install Backwater Prevention Valves
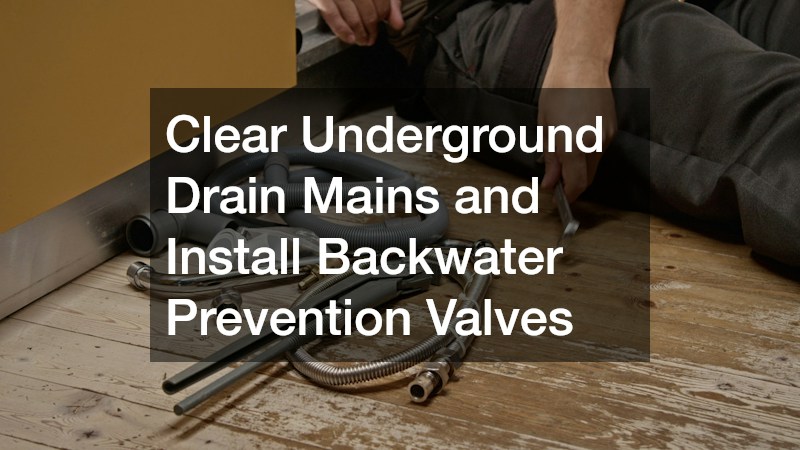
Sanitary sewer and stormwater drain backups introduce hazardous Category 3 blackwater into lower-level living spaces, requiring extensive environmental decontamination:
- Install a whole-house backwater check valve along the main sewer exit lateral, preventing overburdened municipal stormwater mains from backing up into basement fixtures during cloudbursts.
- Clear seasonal tree root incursions from aging clay tile or cast-iron sewer laterals using mechanical augers equipped with rotating carbide root-cutting heads.
- Schedule a preventative drain cleaning service utilizing commercial high-pressure hydro-jetters every two to three years to scour accumulated fats, scale, and organic debris from the inner pipe walls.
- Commission an in-line fiber-optic sewer camera inspection to locate misaligned joints, pipe bellies, or structural collapses prior to completing expensive basement refinishing projects.
Developing an emergency readiness plan rounds out these structural and mechanical defenses. Every adult occupant in the household should know the exact location of the main domestic water shut-off valve and how to operate its lever or wheel without hesitation. Storing emergency extraction equipment, keeping spare mechanical float switches on hand, and archiving detailed maintenance logs safeguard physical assets against unpredictable weather events. By taking command of structural drainage pathways, reinforcing external building envelopes, and systematically updating domestic plumbing components, homeowners protect their investments, guarantee occupant safety, and preserve the durability of their living environments for generations to come.